Binary marble adding machine
Summary
In this tutorial, we will model a binary marble adding machine created by Matthias Wandel (http://woodgears.ca/marbleadd/). Our adding machine will be able to count up to 7 marbles. How it works and why it is called a binary adder will be discussed at the end. You need version 1.04 or later (go to Help -> About menu to find out the version) to follow this tutorial. Make sure you finish the previous tutorials before starting this one.
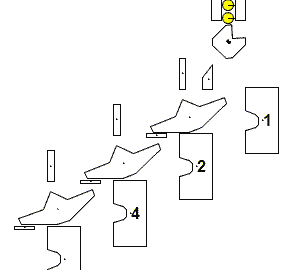
Figure-1
Flip-flop
First, make sure the grid and snap-to-grid options are on and the box option is off. Then, create a polygon as shown in Figure-2. Make sure that your polygon is exactly as shown in Figure-2 by counting the number of grid squares. Place a hinge as shown in Figure-1 to finish the first flip-flop and rename it as flip_flop1.
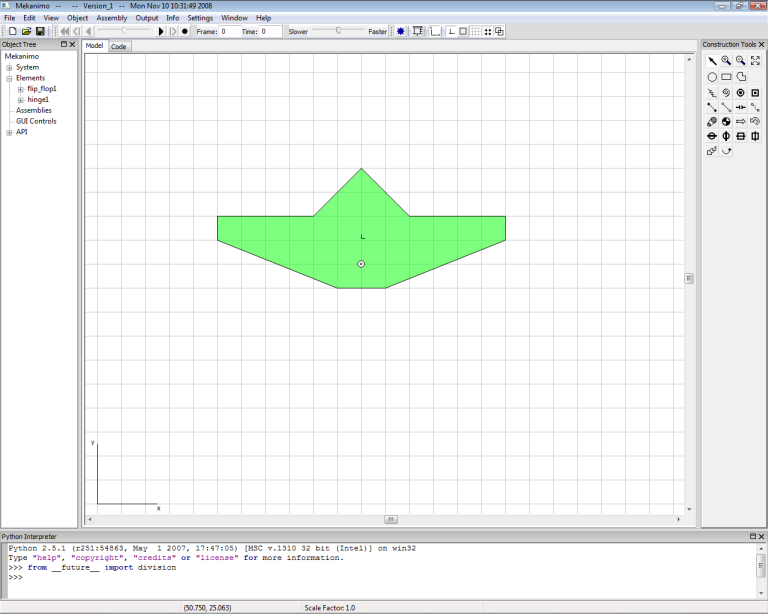
Figure-2
Marble retainer
Create a polygon as shown in Figure-3 and weld it to the ground. Count the number of grid squares to make sure the dimensions and spacing between the flip-flop and the retainer are exactly as shown. Rename this as retainer1

Figure-3
Stopper
Create a rectangle as shown in Figure-4 and weld it to the ground. Count the number of grid squares to make sure the dimensions and spacing between the stopper and the retainer are exactly as shown. Rename this as stopper1
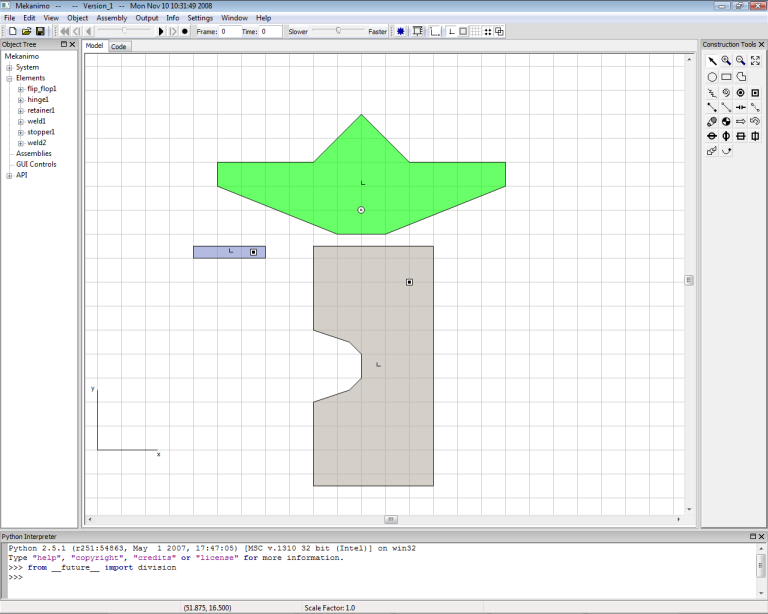
Figure-4
Second retainer
Copy and paste the first retainer and position it as shown in Figure-5 and weld it to the ground. Count the number of grid squares to make sure the dimensions and spacing between the two retainers are exactly as shown. Rename this as retainer2
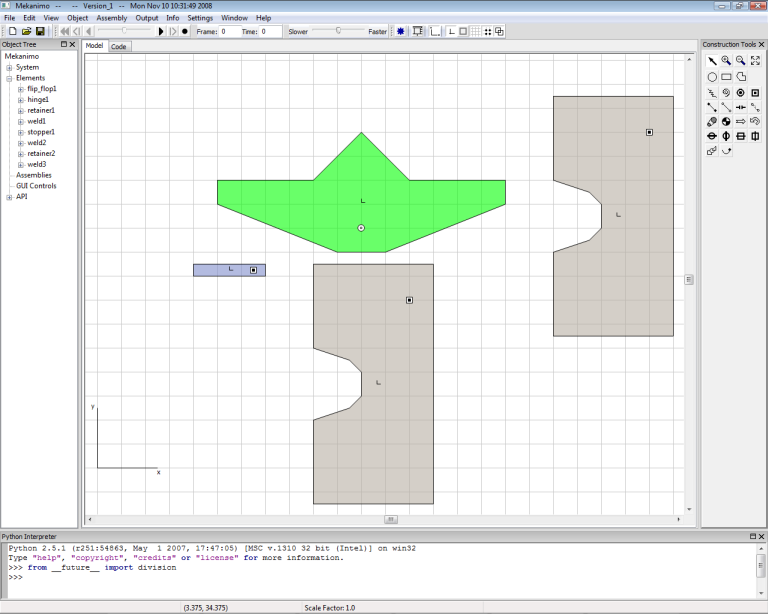
Figure-5
Test run
Create a circle with one-grid-square radius as shown in Figure-6 and rename it as marble1. Drag the flip_flop1 so that it looks similar to Figure-6. Do not use the rotation handle, just click and drag! Now we can run the model to see how we are doing so far.

Figure-6
Adjustments
When I ran the model I noticed that the marble was not heavy enough to flip the flip-flop. To correct this, I adjusted the marble’s weight value by a factor of ten as shown below and ran it again. This time it seemed to work.
Modifying marble weight
>>> marble1.weight = marble1.weight * 10
Copy and paste the flip-flop, retainer, and stopper
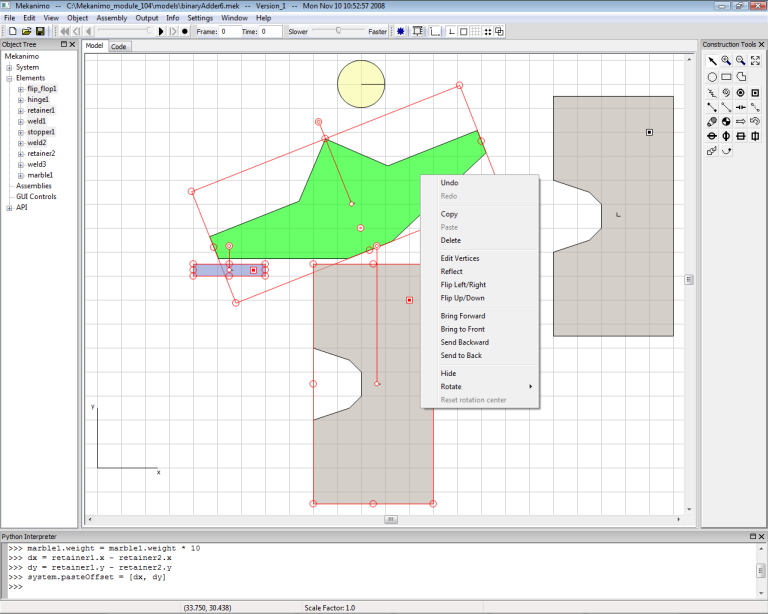
When objects in the clipboard (copied objects) are pasted, Mekanimo creates them in an offset position from the originial object. Since we need to place the second set of objects with the same offset as the x and y offset values between retainer1 and retainer2, we need to modify these offset distances from the Python interpreter as shown below and copy and paste the first set. Select flip-flop1, retainer1, stopper1, hinge1, weld1, and weld2 by drawing a selection rectangle or from the object tree. Then, click the right mouse button to bring up the popup menu and select Copy from the menu as shown in Figure-7. Paste the selection by using the popup menu (Alternatively, Ctrl-C and Ctrl-V keyboard shortcuts as well as the edit menu can be used for copy and paste operations.). Your results should look similar to Figure-8.
Copy and paste the flip-flop, retainer, and stopper again
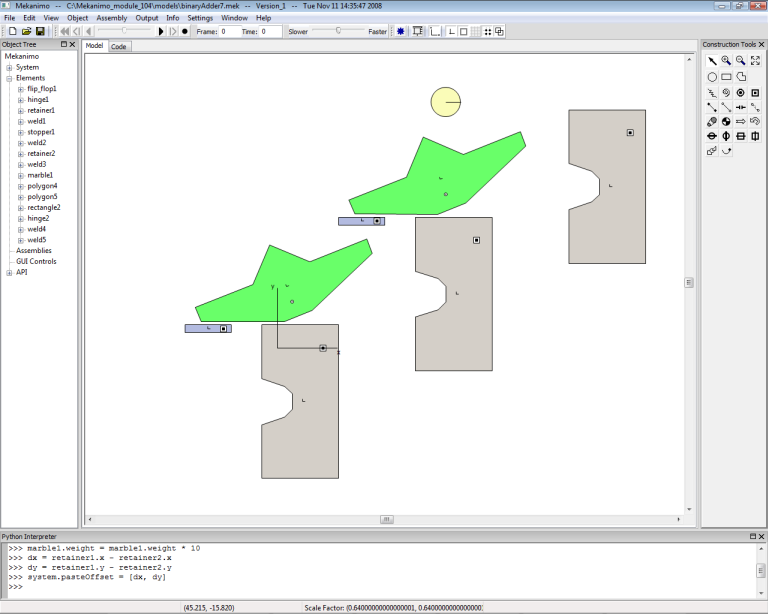
Repeat the last step to create the last flip-flop, retainer and stopper set. Your model should look like Figure-9 now.
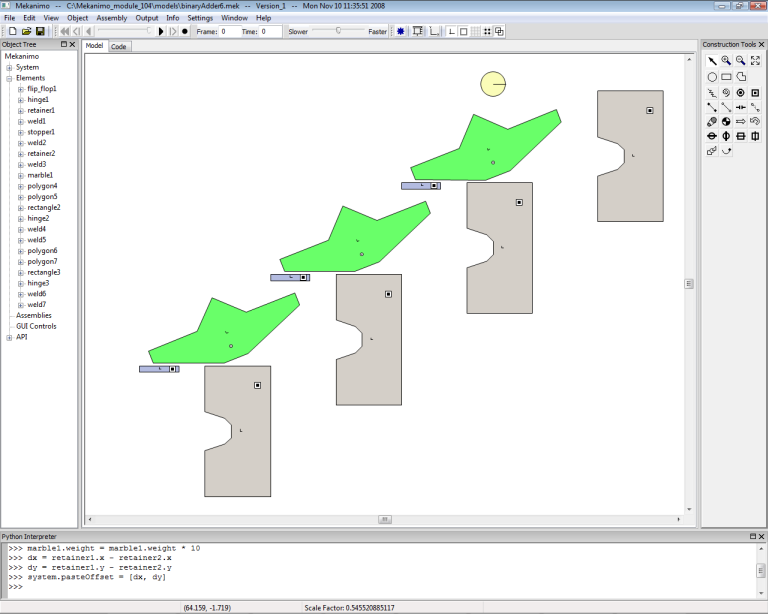
Figure-9
Marble Feeder
To feed the marbles into the binary adder, we need to design a mechanism that can feed one marble at a time in regular intervals. Several feeder designs are shown in Figure-10, Figure-11, and Figure-12.
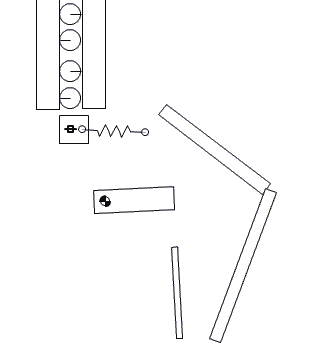
Figure-10

Figure-11
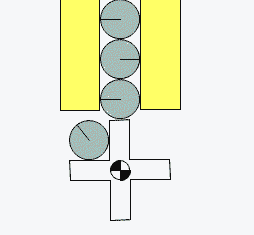
Figure-12
Marble holder
Our binary adder can count up to seven marbles so we need a holder that can hold at least seven marbles. We create the marbles first, then create the holder. Move the marble1 to the position shown in Figure-13 and type the code as shown in ‘Creating a grid of marbles’ code snippet below. You should have 8 marbles as shown in Figure-14. Now create a rectangle as shown in Figure-15 and reflect this to finish the marble holder as shown in Figure-16 and weld both rectangles to the ground.
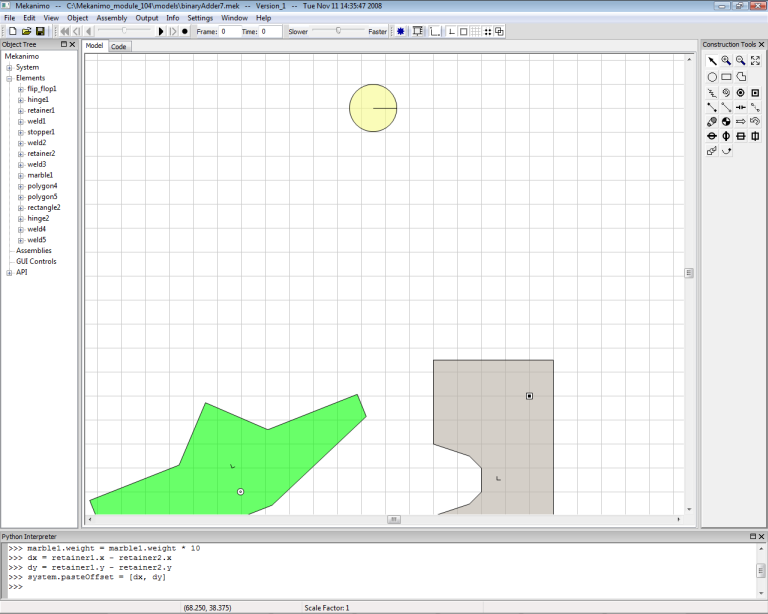
Figure-13
Creating a grid of marbles
>>> Grid(rows=8, cols=1, obj=marble1, pos=marble1.pos)
>>>
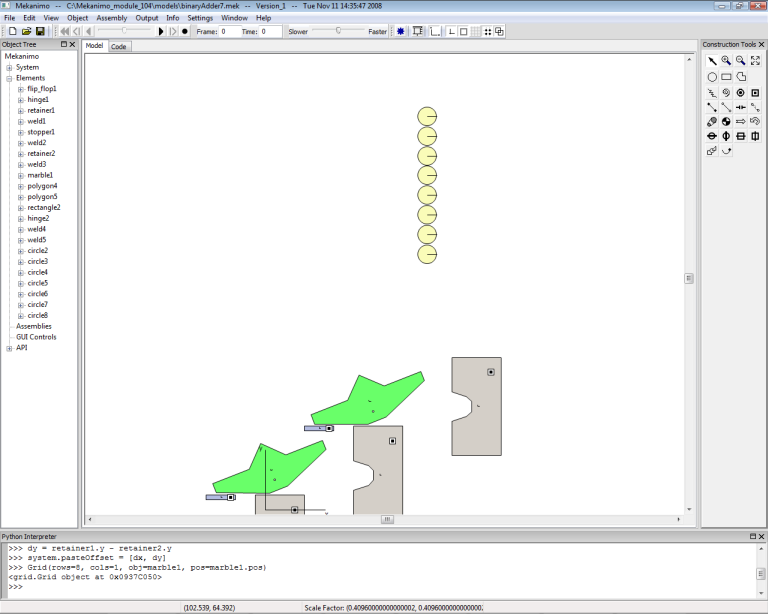
Figure-14
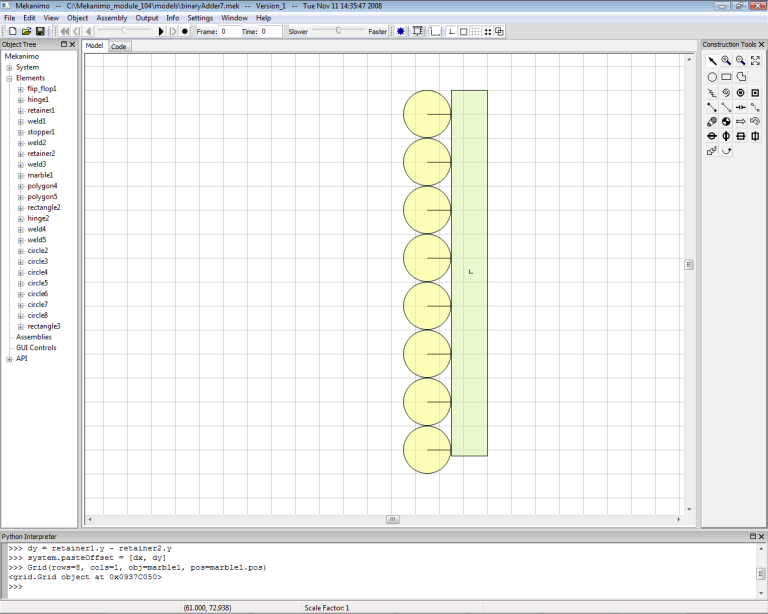
Figure-15
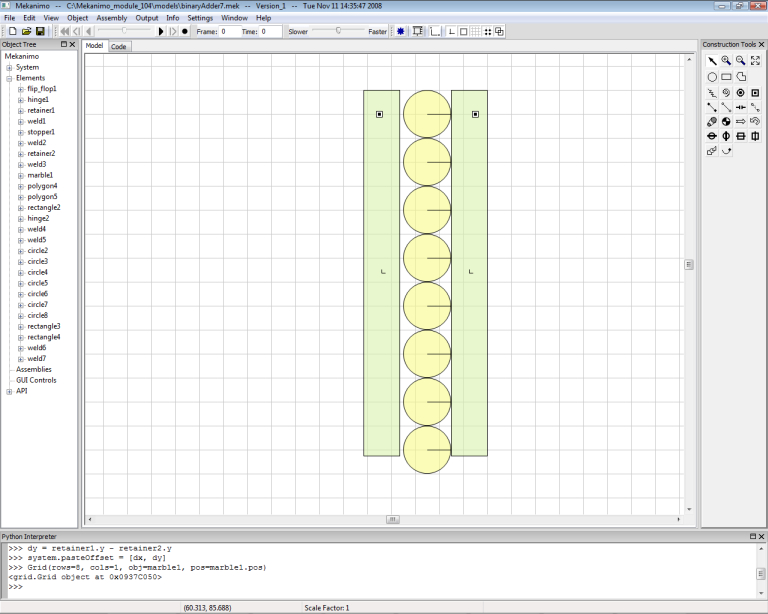
Figure-16
Marble Dispenser
To feed the marbles with periodic intervals, we need to create a dispenser similar to the one shown in Figure-11. Create a polygon and place a motor as shown in Figure-17. Then set the motor’s RMP to 30. Next, create the marble guides as shown in Figure-18 and weld both guides to the ground. Your model should look similar to Figure-19.
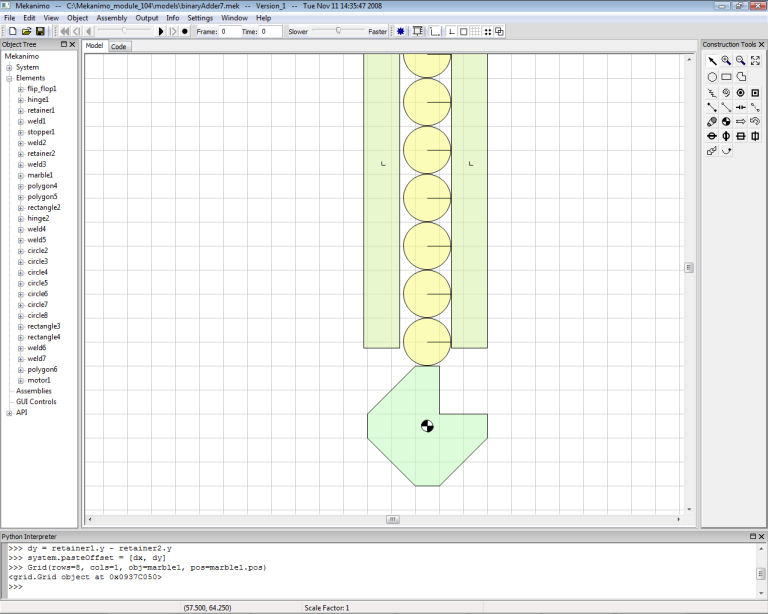
Figure-17
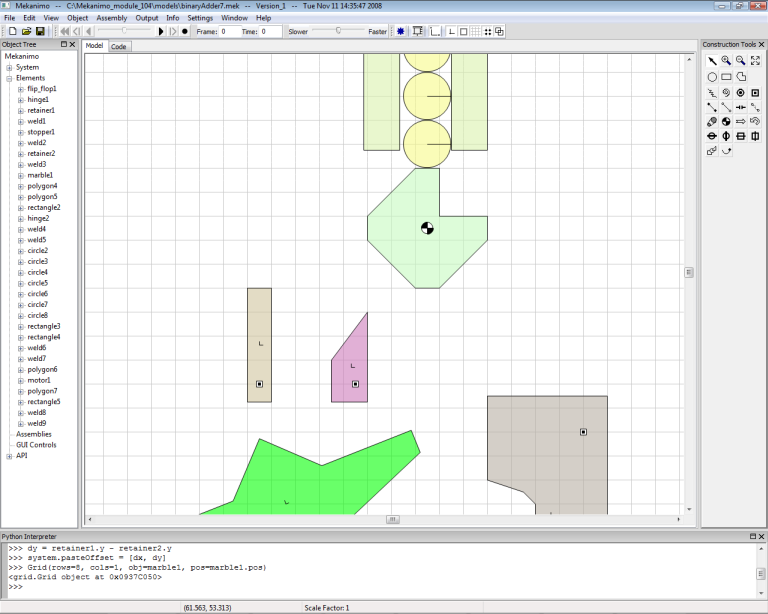
Figure-18
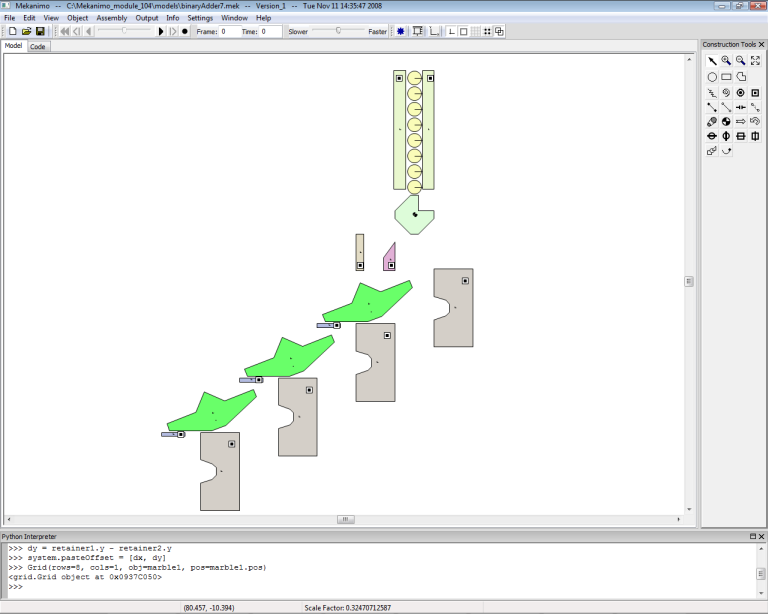
Figure-19
Test Run and Final Adjustments
Now we are ready to run the simulation. When I ran it, I noticed that marbles seemed to be too bouncy. When you drop a steel ball bearing on a piece of wood, the ball bearing should not bounce much. And, in some cases, ball bearings went over the flip-flops. To address these, I changed restitution (bounciness) value from .6 to .2 and copied and pasted the guide for other retainers. Instead of modifying the restitution values from the GUI, I just used the Python interpreter as shown below. The final simulation is shown in Figure-20.
Modifying restitution (bounciness) values
>>> for c in system.circles:
       c.restitution = .2
- system.circles is a list of circles in the model.
To access other element groups you can use these system attributes:
- system.polygons
- system.rectangles
- system.rigidBodies: circles + rectangles + polygons
- system.springs
- system.hinges
- system.welds
- system.beams
- system.links
- system.torSprings: torsional springs
- system.gaps
- system.chains
- system.belts
- system.motors
- system.vSliders: vertical sliders
- system.hSliders: horizontal sliders
- system.vRails: vertical rails
- system.hRails: horizontal rails
- system.connectors: all connectors
- system.forces
- system.torques
- system.assemblies
- system.traces
Figure-20
How does it count?
We just add up the values of the retainers. Each retainer corresponds to a binary digit. A binary digit can be either zero or one. If there is a marble at a retainer then it represents one, zero otherwise. This is the reason why this system is called a binary adder. The location of a retainer and the presence of a marble determines the value of that retainer as shown below.
First retainer (labeled as 1) with a marble has a value of 1 (2**0 = 1), without a marble has a value of 0. Second retainer (labeled as 2) with a marble has a value of 2 (2**1 = 2), without a marble has a value of 0. Third retainer (labeled as 4) with a marble has a value of 4 (2**2 = 4), without a marble has a value of 0.
Our system can represent eight numbers, 0 through 7 (22 + 21 + 20 = 4 + 2 + 1). If we had another flip-flop, that system could represent 16 numbers, 0 through 15 (23 + 22 + 21 + 20 = 8 + 4 + 2 + 1).
This is analogous to the way binary numbers are represented. To make this a little bit easier to see we can compare it to the decimal system.
Decimal numbers:
975 = 9 * 10**2 + 7 * 10**1 + 5 * 10**0 = 900 + 70 + 5
Binary numbers:
(101)two = 1 * 2**2 + 0 * 2**1 + 1 * 2**0 = 4 + 0 + 1 = 5 (we don’t write (5)ten)
![]()
Table Of Contents
- Binary marble adding machine
- Summary
- Flip-flop
- Marble retainer
- Stopper
- Second retainer
- Test run
- Adjustments
- Copy and paste the flip-flop, retainer, and stopper
- Modifying paste offset values
- Copy and paste the flip-flop, retainer, and stopper again
- Marble Feeder
- Marble holder
- Creating a grid of marbles
- Marble Dispenser
- Test Run and Final Adjustments
- Modifying restitution (bounciness) values
- How does it count?