Ragdolls
Summary
In this tutorial we will create two rag dolls to introduce Mekanimo’s polygons, connectors and assemblies. Please make sure to go through the first tutorial before this one.
Head and neck
First, we will set up the work place by deactivating the system box and toggling the grid and snap to grid options on like we did in the first tutorial.
- Create a circle with a radius of about 2 to 3 units to represent the head.
- Create a rectangle as shown in Figure-1 to represent the neck.
- You can resize either the circle or the rectangle by selecting them first and then dragging the resize handles if necessary.
- Now name the circle1 and rectangle1 as ‘head’ and ‘neck’ respectively. This time we will use the Python interpreter instead of the object tree to rename these rigid bodies as shown below.
Renaming objects from the Python interpreter
>>> circle1.name = 'head'
>>> rectangle1.name = 'neck'
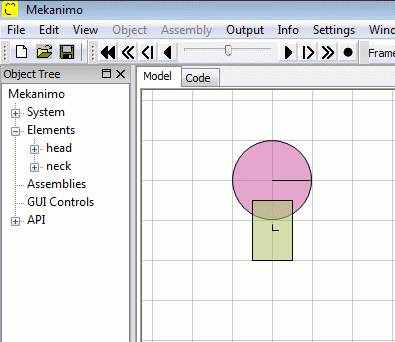
Figure 1: Head and neck
Torso
Now we need to create a torso for our first rag doll. Set the canvas mode to POLYGON by clicking on the polygon tool(see Figure-2). Alternatively you can press P on the keyboard to do the same.

Figure 2
Polygon
To create a polygon, click on a spot to form the first vertex of the polygon and release the left mouse button. When you move the cursor a rubber band should indicate the first edge of the polygon. Click and release the left mouse button in an appropriate position to create the second vertex of the polygon as shown in Figure-3. We have created the first edge of the polygon. Now create the second and third edges as shown in Figure-4. If we make a mistake we can press Delete to cancel the last vertex. To finish the polygon press Enter or click on the first vertex.
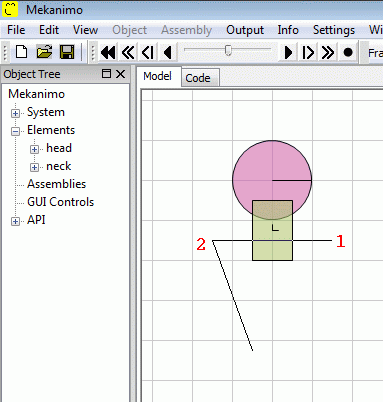
Figure 3
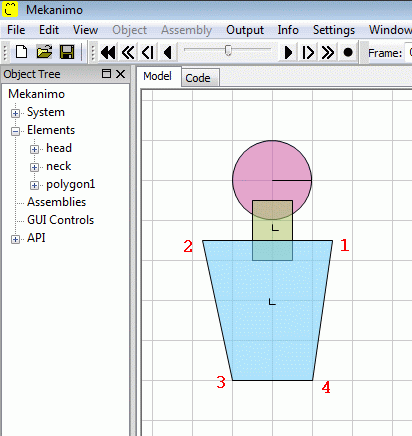
Figure 4
Edit the polygon
- Click on the polygon to select it (alternatively you can select the polygon from the object tree).
- Right click on the canvas to bring up the pop-up menu as shown in Figure-5 and select “Edit Vertices”. Draggable vertex handles (black circles) should appear as shown in Figure-6.
- By draggin these vertex handles edit the torso so that it ends up similar to the one in Figure-7. To get out of the edit vertices mode click on an empty spot in the canvas.
- Finally, rename polygon1 as ‘torso’.
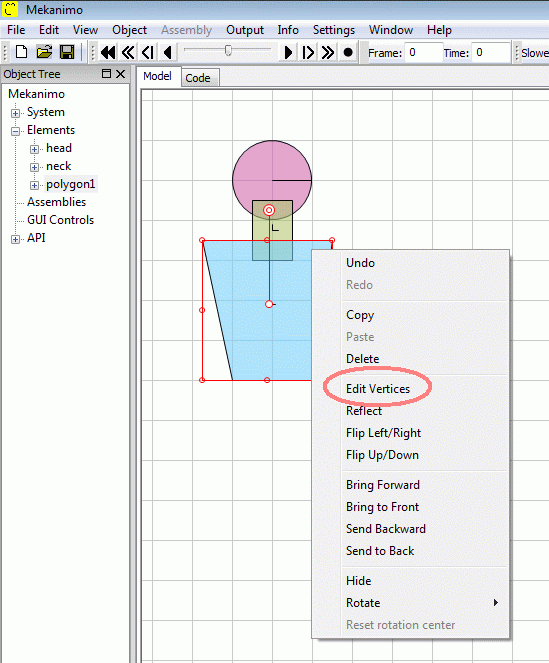
Figure-5: Pop-up menu
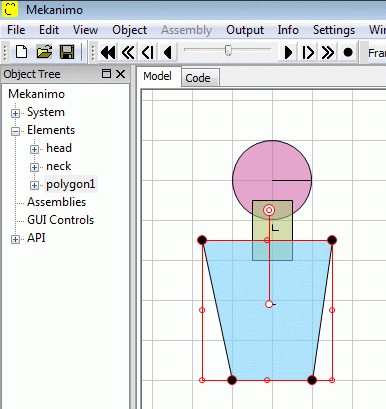
Figure-6: Vertex handles
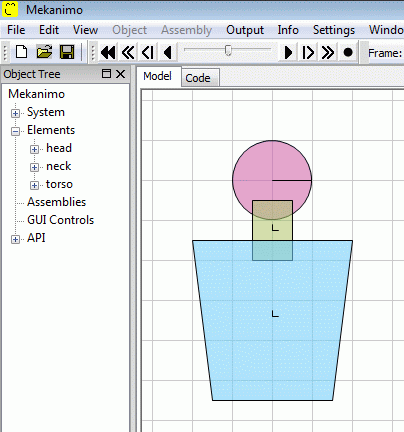
Figure-7
Arm
- Create two rectangles as shown in Figure-8 to represent the arm.
- Select the forearm so that selection and rotation handles are visible.
- Drag the root of the rotation handle to the position shown in Figure-9
- Drag the head of the rotation handle to rotate the forearm as shown in Figure-10. If you need to reset the rotation handle’s position you can click on the Reset rotation center (the last item in the pop-up menu (see Figure-5).
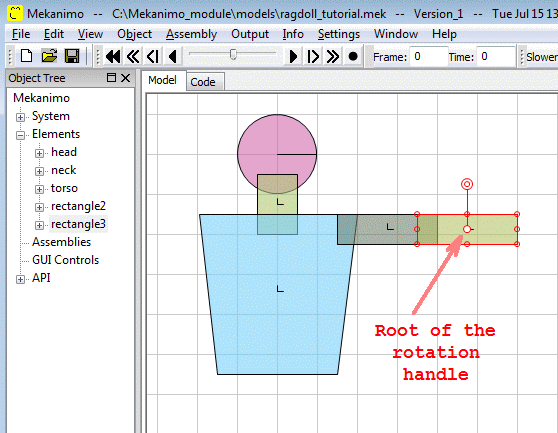
Figure-8
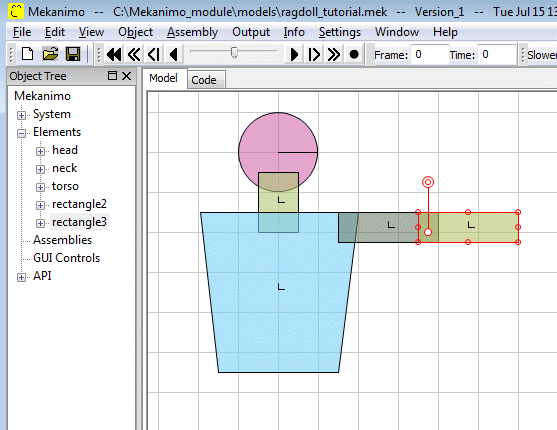
Figure-9
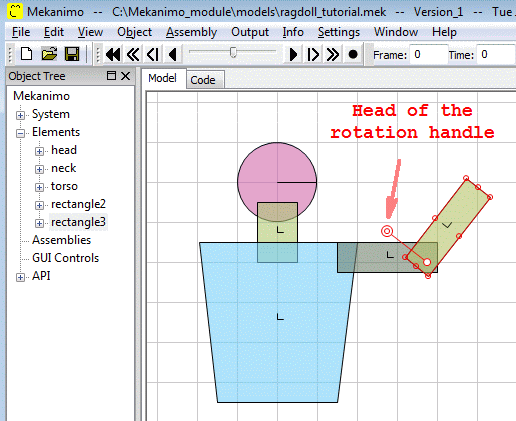
Figure-10
Joints
- Set the canvas mode to TORSPRING (torsional spring) by clicking on the torsional spring tool (see Figure-12).
- Turn the snap to grid mode off if you are having difficulties positioning the joints.
- Create two torsional springs for the neck and one for the ankle as shown in Figure-13. To create a torsional spring, just click on the spot you need to form the joint.
- Set the canvas mode to PIN by pressing I. Cursor should change into a cross icon.
- Create the shoulder, elbow, hip, and knee joints as shown in Figure-14. Again, just click on the joint locations to create the hinges.
- Rename the joints as shown in Figure-14.
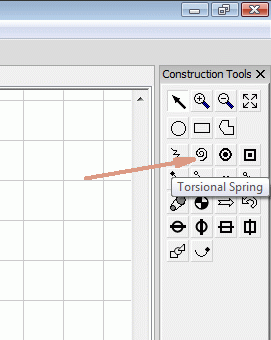
Figure-12
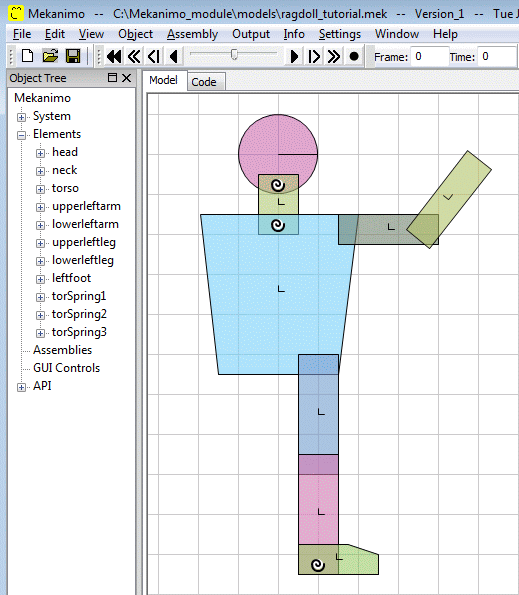
Figure-13: Torsional springs
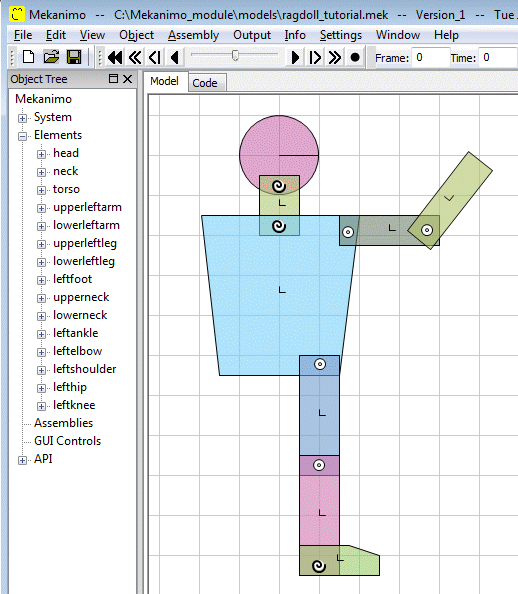
Figure-14: Pin joints
Reflect the arm and leg
- By using the object tree select upperleftarm, lowerleftarm, leftelbow, upperleftleg, lowerleftleg, leftfoot, leftankle. To make multiple selections from the object tree, you can hold Ctrl while making your selections. Please note that selecting an already selected item while holding Ctrl deselects that item. If you hold Shift and make multiple selections, items between your two selections get selected as well.
- Rightclick somewhere on the canvas to bring up the pop-up menu and click Reflect.
- Move the cursor around to experiment with the reflect mode. Finally, click on a spot to get a reflection of the selected elements as shown in Figure-15.
- Create the left shoulder and hip. Rename the rest of the members as well.
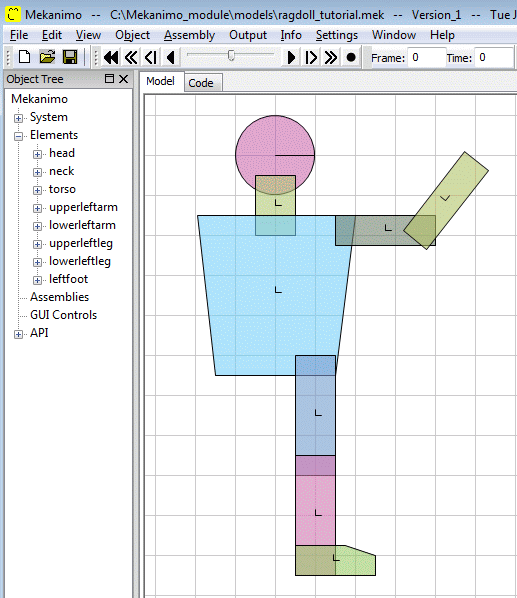
Congratulations. We have created the first rag doll of the family. Your guy should look similar to the one in Figure-16. This concludes the first part of this tutorial. We will create the rest of the family in Part-2 by duplicating and modifying this guy.
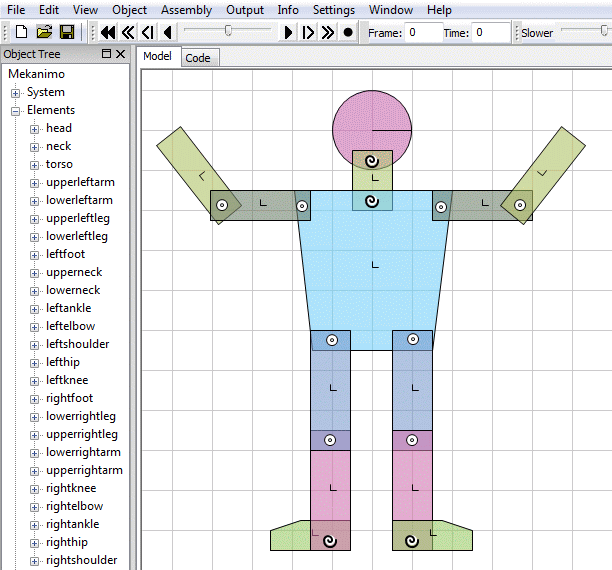
Figure-15
Kid
- Select the guy by drawing a selection rectangle around him. Alternatively you can press Ctrl+A to select everything.
- Rightclick somewhere on the canvas to bring up the pop-up menu and click Reflect.
- Click on a spot to reflect the guy similar to Figure-1.
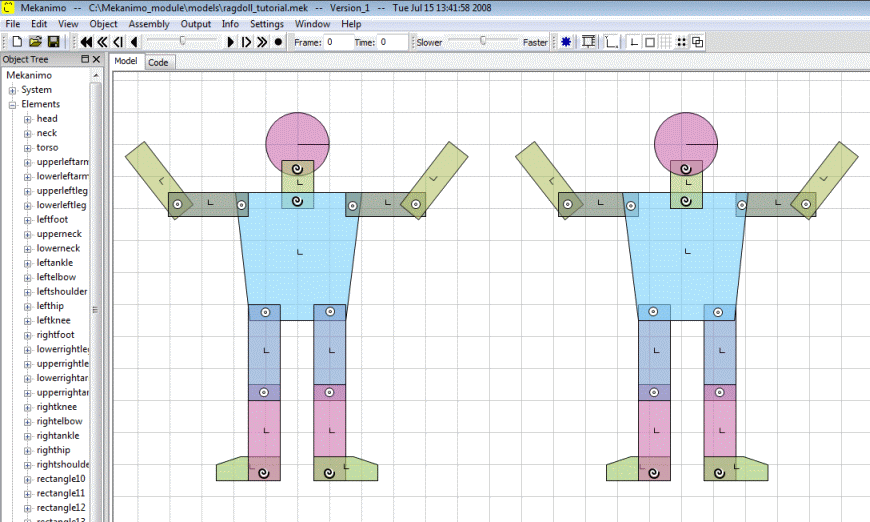
Figure-16
Assembly
Now we are going to scale down the reflection of the guy to create a kid. To scale the whole body, we need to create an assembly first. Select the whole body with the selection tool and then click on the assembly in the tool box as shown in Figure-17. At this point you may want to pay attention to the object tree and see how the assembly and components are shown. Rename the assembly as “Kid”
Scale
Select the assembly by clicking on it or by selecting it from the object tree. Then, drag one of the resizing handles and scale it down by about a factor of two as shown if Figure-18.
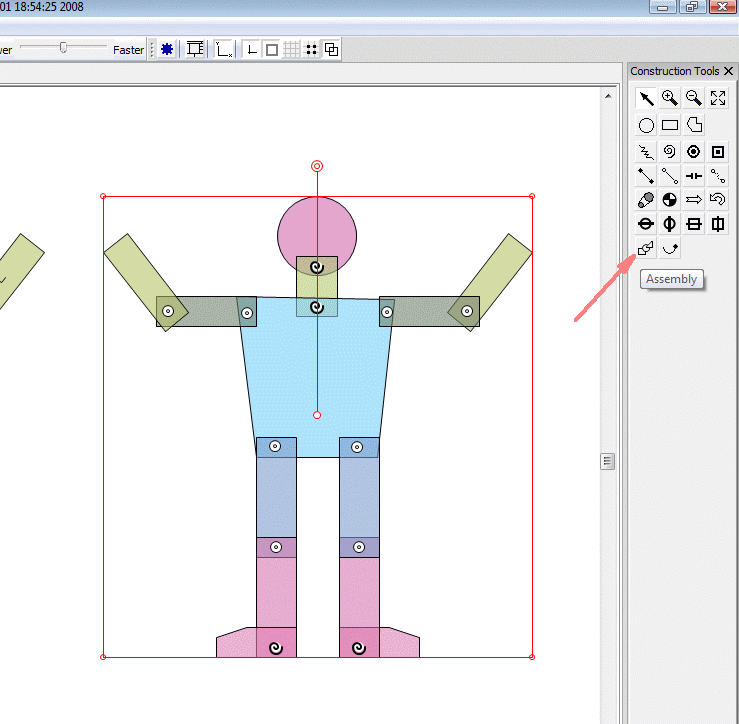
Figure-17
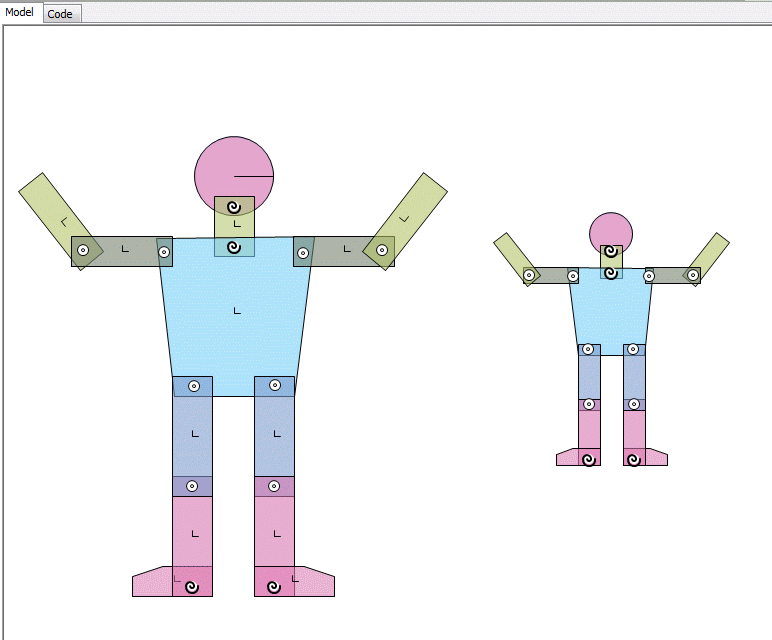
Figure-18