Sprites
Mekanimo provides an interface to represent the rigid body shapes with sprites. The shape or size of the sprites cannot modify the behaviors of the rigid bodies. Solver pays no attention to sprites. Sprites could be either animated or static. As an example of animated sprites a flying bat is shown in Figure 1.
Figure 1: An animated sprite
This sprite is made of individual frames as shown in Figure 2. Each frame is saved as a separate file. There is no limit to the number of frames that can be used in animated sprites.
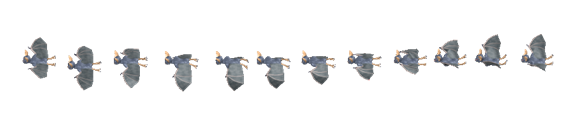
Figure 2: Individual frames
To assign a sprite to a rigid body, use the Object Set Sprite menu to bring up the available sprites sub-menu and select a sprite.
The same task can be accomplished programmatically as shown below.
circle1.sprite = Sprite(system.sprites[('animal', 'elephant')])
Alternatively you can assign a custom sprite by using a file path.
circle1.sprite = Sprite(filePath="c://mysprites//cougar.png")
If you would like to make a certain color transparent you can use the optional transparentColor argument as shown below.
circle1.sprite = Sprite(filePath="c://mysprites//cougar.png", transparentColor=(255, 255, 255))
Offset (position)
Mekanimo aligns the center point of the sprite with the center of gravity of the underlying rigid body by default. Sometimes it may be desirable to position a sprite with an offset. This can be accomplished from the object tree (see Figure 3) or the Python interpreter as shown below.
>>> circle1.spriteOffset = [2, 10]
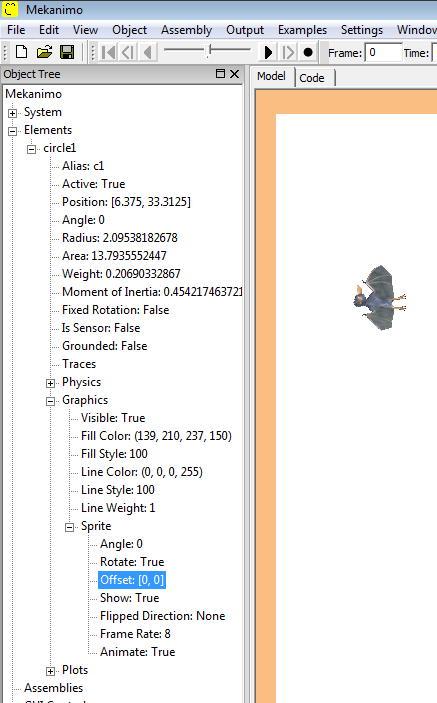
Figure 2: Setting sprite offset from the object tree
Angle (orientation)
Sprites are shown with no rotation by default. In some cases it may be desirable to show them with an orientation angle. The specified orientation angle is defined in terms of the underlying rigid body’s local coordinates. For example, we can display the bat flying with a 45 degree angle instead of horizontally by setting the spriteAngle attribute to -pi/4 (see Figure 3). The default value for this attribute is 0.
Note
If the bat was flying towards the east then the angle would be pi/4 instead of -pi/4.
Similar to the spriteOffset attribute, spriteAngle can be manipulated from the object treee or the Python interpreter.
>>> circle1.spriteAngle = -pi / 4
Figure 3: The bat sprite with non-zero orientation angle.
Rotation
When the underlying rigid body rotates, assigned sprites rotate by the same amount by default. This behavior may not be appropriate for some cases. To keep the orientation angle of the sprites fixed regardless of the underlying rigid body’s orientation angle ‘rotateSprite’ attribute can be changed to False. The default value for this attribute is True.
Similar to the spriteOffset and spriteAngle attributes, rotateSprite can be manipulated from the object treee or the Python interpreter.
>>> circle1.rotateSprite = False
Hide/Show
When we need to hide the sprite and look at the underlying rigid body, we can set the showSprite attribute to False. showSprite attibute can be modified from the object tree or the Python interpreter.
>>> circle1.showSprite = False
Note
If you would like to display neither the rigid body nor the sprite then underlying rigid body’s visible atttribute can be set to False.
Flipped direction
When we use animals or other objects with distinct head and tail directions, it may be desirable to keep the head direction consistent with the horizontal motion of the underlying rigid body. flippedSpriteDir attribute can be used to specify the sprite orientation as a function of the underlying rigid body’s horizontal movements. flippedSpriteDir can take None, POSX, or NEGX values. If the NEGX is specified, then when the rigid body’s horizontal velocity becomes negative, the assigned sprite is flipped (in left-right direction) automatically and when the horizontal velocity becomes positive again the sprite is flipped so that the desired horizontal sprite orientation is maintained.
Figure 4: flippedSpriteDir example.
>>> circle1.flippedSpriteDir = NEGX
Similar to the other attributes, flippedSpriteDir can be changed from the object tree as well. The default value for the flippedSpriteDir is None.
Frame rate
To prevent different computers to display the animated sprites at different speeds, a frame rate can be set. Frame rate is specified in terms of frequency. For example, a frame rate of 12 would cause the each frame to be displayed for 1/12 seconds.
Stopping animation
In some cases we may want to stop looping through the frames in an animated sprite and display a specific frame.
Animations with static sprites
By combining Mekanimo’s mechanism building abilities with static sprites, we can create animated characters that behave realisticly. For example, a mouse can be simulated by creating body parts like head, upper body, lower body, upper leg, lower leg, etc. Then these body parts can be connected together by using various connectors. If we assign different sprites to these body parts then when the individual parts move the sprites move with them and very realistic looking animations can be achieved. As an example see ???.
Adding your own sprites
Mekanimo can use sprites in bitmap, jpeg, gif, or png formats. You can create your own sprites and add them to the sprites sub-directory in the Mekanimo installation directory. See tutorial ??? for an example.
File naming convention
Sprites are named by combining a group name, sprite name, and sprite number (for animated sprites only). For example, adding files named animal_lion_sprtNo_0.png, animal_lion_sprtNo_1.png, animal_lion_sprtNo_2.png, animal_lion_sprtNo_3.png would create a single animated sprite with four frames. If you add these files into the sprites sub-directory in Mekanimo’s installation directory and restart Mekanimo, a menu item named lion would appear under the `Object Set Sprite animal sub-menu. If you added a file named animal_tiger.png into the sprites directory, this would create a menu item named tiger under the animal submenu that can be used to assign a static sprite.
Resizing sprites
If you need to use a sprite with different dimensions than the original size, you can resize the sprite as shown below. In this example sprite size will be 50% of the original in both horizontal and vertical directions.
>>> circle1.sprite.scale(.5)
Note
Currently sprites can be resized from the Python interpreter (or code panel) only.
Sprites can be scaled in different rates in horizontal and vertical directions as shown below.
>>> circle1.sprite.scale(2, .5)
Removing a sprite
Sprites can be removed from the Object Set Sprite menu by selecting No Sprite sub menu option or from the Python interpreter as shown below.
>>> circle1.sprite = None